Swift Packages - New in Swift 5.3

Following up on one of my previous article, it is time to revisit Swift Packages and discover what is new in Swift 5.3 and Xcode 12 and how we can take advantage of all the new features.
SwiftUI Previews
With SwiftUI becoming increasingly more popular it only makes sense that we now have proper SwiftUI preview support for packages starting from Xcode 12.
Before Xcode 12, rendering SwiftUI previews for packages required a couple of workarounds which involves creating an Xcode workspace and adding a client application, etc. Luckily, none of these workarounds are needed anymore.
Updating from earlier versions
A few essential things to keep in mind when updating your existing Swift Packages created with earlier versions of Swift or Xcode.
Ensure that you update your package manifest to use the latest required tools version:
1
swift-tools-version:5.3
Remember to specifiy the platforms and their versions your package supports:
1
platforms: [.iOS(.v13), .macOS(.v10_15), .watchOS(.v6), .tvOS(.v13)]
When adding a SwiftUI view to your package in Xcode 12 you may encounter the following error when trying to render the preview:
SchemeBuildError: Failed to build the scheme "". To resolve the error, simply remove.testTargetentry in your package manifest file (Package.swift). This appears to be a bug in Xcode 12.
Package Resouces
Also new in Swift 5.3 and Xcode 12, is the ability to add resources such as images, storyboards, asset catalogs, localized resources, and much more.
This was one of the key features that was missing in earlier versions of Swift and I’m really glad to see it finally being implemented.
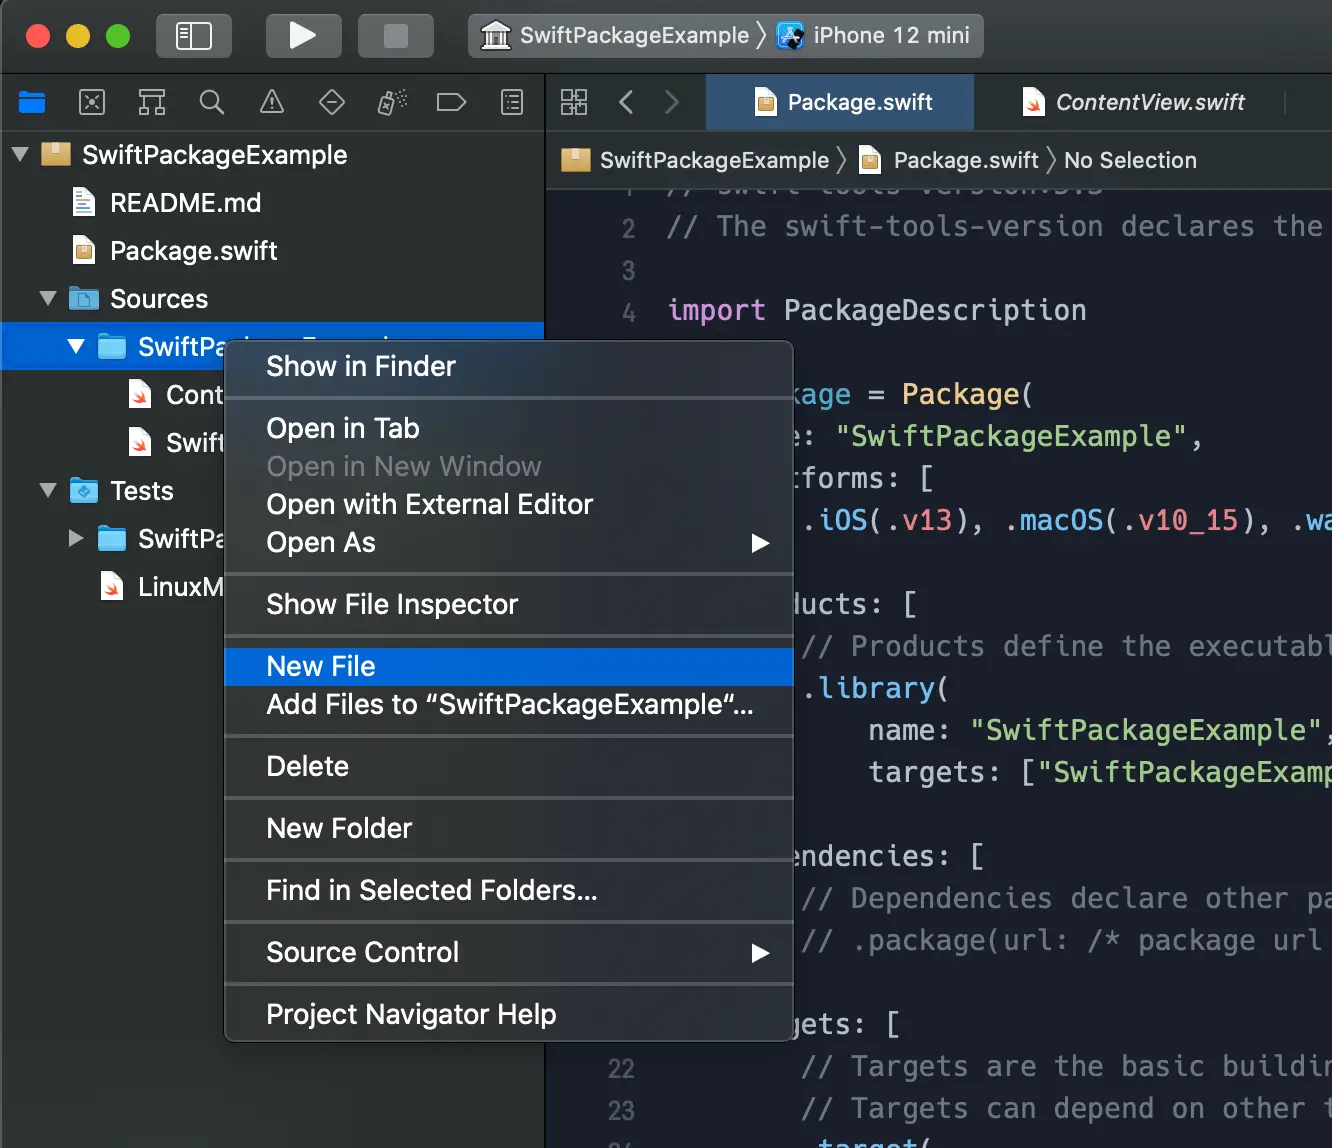
Adding resources to a package
Adding resources to a package is pretty straightforward - simply create a new file or add an existing file in your package folder under your package’s Sources folder:
Resource file types
Files in a package are processed according to their type, as indicated by the filename suffix.
Clear purpose resource files like .xcassets, .storyboard, .xib, .nib, .xcdatamodel, xcmappingmodel, etc. has clear purpose and Xcode knows what to do with them. These clear purpose resource files can simply be added without any additional action required.
Other types of resource files can have a variety of purposes and for those, we need to declare their intent in the package manifest.
Declaring the resource’s intent
Let’s have a look at the following package manifest:
1
2
3
4
5
6
7
8
9
10
11
12
13
14
15
16
17
18
19
20
21
22
23
24
25
26
// swift-tools-version:5.3

import PackageDescription

let package = Package(
    name: "SwiftPackageExample",
    defaultLocalization: "en",
    platforms: [
        .iOS(.v13), .macOS(.v10_15), .watchOS(.v6), .tvOS(.v13)
    ],
    products: [
        .library(
            name: "SwiftPackageExample",
            targets: ["SwiftPackageExample"]),
    ],
    targets: [
        .target(
            name: "SwiftPackageExample",
            excludes: ["Release Notes.txt"],
            resources: [
                    .process("Image.png"),
                    .process("StaticData.json"),
                    .copy("Zip Codes")]
        )
    ]
)
Adding files
Because Image.png does not have a clear purpose, we need to declare the file’s intent in the package manifest. We do so by adding a .process action:
1
resources: [.process("Image.png")]
Most resources should use the
.processaction for it to be transformed as appropriate at build time. The type of processing that will take place greatly depends on the platform for which the package is built.
Adding folders
You can also add folders using the .copy action:
1
resources: [.copy("Zip Codes")]
Using the
.copyaction will copy the entire folder while also preserving the folder structure.
Excluding files and folders
Some files or folders might only be needed during development and can be excluded:
1
excludes: ["Release Notes.txt"]
The same syntax above also applies for excluding folders.
A couple of notes regarding resource processing
Processing:
- The
.processaction uses the built-in rules as appropriate for the platform - Recommend choice except in special circumstances
- Falls back to
.copyif the file type is unknown or when no special processing is needed - For folders, the processing rules are applied recursively to all files under the directory
Copying:
.copymakes a verbatim copy regardless of the file type- No transformation takes place, good for source files, etc.
- Copies the whole directory as-is, preserving the folder structure
How are resources linked and bundled together with your app?
Source files of a package get compiled into a code module and then linked into the app. Resources of a package get processed into a resource bundle and then gets embedded in the app.
The resource bundle becomes part of the main app bundle and therefore will be available at runtime.
For unbundled applications like command-line applications, resource bundles need to be installed alongside the application/tool.
Accessing package resources from code
Accessing package resources from code is equally straightforward and is mainly done using Foundation’s Bundle API. Accessing resources is the same on all platforms that support Swift Packages and is independent of built artifacts.
Accessing a file using the module bundle directly:
1
2
// Swift
let path = Bundle.module.path(forResource: "StaticData", ofType: "json")
1
2
// Objective-C
NSString *path = [SWIFTPM_MODULE_BUNDLE pathForResource:@"StaticData" ofType: @"json"];
Passing the module bundle to APIs:
1
2
// Swift
let image = UIImage(named: "Image", in: .module)
1
2
// Objective-C
UIImage *image = [UIImage imageNamed:@"Image" inBundle: SWIFTPM_MODULE_BUNDLE];
Best practices when accessing resources:
- Add each resource to the module that uses it
- If you need your resource to be visible from other modules, provide typed public accessors for individual resources
- Don’t vend the whole resource bundle as an API to avoid external dependencies
Localized Resources
Another great addition to Swift Packages is the ability to add localized resources to your package.
The very first thing to do is to set the default localization language in the package manifest:
1
defaultLocalization: "en"
Setting the default localization language will also be used as a fallback in case no better match can be found at runtime.
Next, we need to create a localization directory for our default localization:
- Create a localization folder i.e.
en.lproj - Create a
Localizable.stringsfile - Add you localized string keys
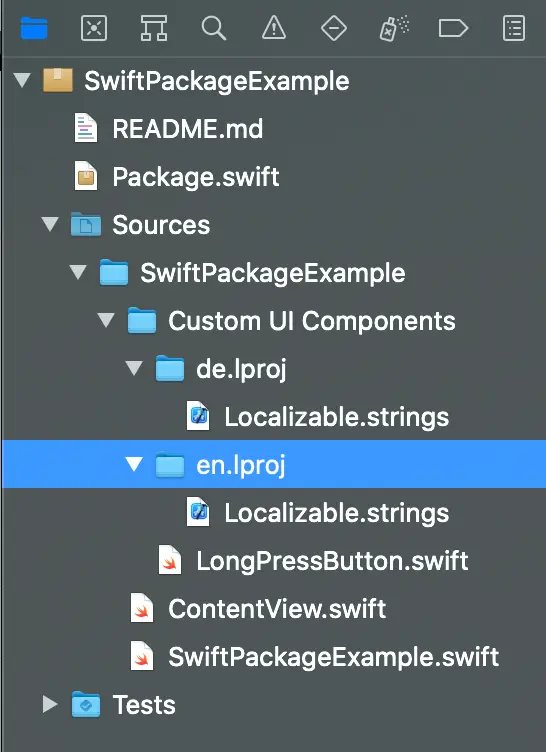
Repeat the steps above for all other languages your package will support.
Using localized strings in SwiftUI:
1
Text("Settings", bundle: .module)
With SwiftUI we can easily customize the preview by adding an .environment override to see a preview for a specific locale:
1
2
MySwiftUIView()
    .environment(\.locale, .init(identifier: "de"))
You don’t need to add the localization directories in the package manifest since the
.lprojfile suffix makes the purpose of the file clear.
Binary Frameworks
Last but not least, we now also have the ability to distribute Binary Frameworks as Swift Packages.
This is especially useful for distributing closed-source binaries when you don’t want or cannot distribute your source code.
Adding a binary dependency
Adding a binary dependency is no different than adding a regular source-based Swift Package dependency. You can either add your dependency using Xcode or by adding it manually to you package manifest:
1
2
3
4
dependencies: [
    .package(name: "Firebase",
    url: "https://github.com/firebase/firebase-ios-sdk.git", .branch("X.Y-spm-beta"))
]
Distributing Binary Frameworks as a Swift Package
Distributing Binary Frameworks as Swift Packages requires that you specifying the following in the targets section of your package manifest:
1
2
3
4
5
6
targets: [
    .binaryTarget(
        name: "BinaryExample",
        url: "https://example.com/binary-example-1.0.0.xcframework.zip",
        checksum: "a40d8b15ed737c5029bf3d99fa0c46a6")
]
A couple of notes regarding binary targets
- Binary targets use XCFrameworks under the hood
- Only supported on Apple platforms
- The URL of the binary can be HTTPS or path-based
- The binary will be downloaded separately when adding the dependency
- The name of the binary target corresponds to the module name
- Like source-based targets, use semantic versioning when versioning your packages
To learn more about Binary Frameworks I highly suggest watching the Binary Frameworks in Swift video from WWDC19.
Swift also includes a neat little tool to compute a checksum for your binary:
1
2
swift package compute-checksum binary-example-1.0.0.xcframework.zip
// outputs: a40d8b15ed737c5029bf3d99fa0c46a6
Summary
With all these new features introduced in Swift 5.3 and Xcode 12, there is not much holding Swift Packages back and I expect the adoption rate for Swift Packages to only increase over time.
Looking ahead, I would like to see some built-in support for package discovery in Xcode. Fortunately, it seems like we might get some traction in this area soon with Proposal SE-0291.