CI/CD with GitHub Actions

Today’s approach to software development requires software to be delivered frequently, reliably, and efficiently. We can achieve this by automating the process using CI/CD pipelines.
Continuous Integration (CI) means using automation tools to build, test, and merge code seamlessly. This is to ensure that code coming from different developers and components is free of errors. Automated tests help spot bugs at the early stage of software development and fix them immediately.
Continuous Delivery (CD) is the practice of releasing software in short cycles, with greater speed and frequency. New code is released in smaller batches, even a few times a day. This makes it more bug-resistant and easier to manage.
GitHub Actions makes it easy to automate all your software workflows, now with world-class CI/CD. Build, test, and deploy your code right from GitHub.
Key features
GitHub Actions offer some really nice features making it a viable option for projects of any size. Best of all, it is free (with limits), even on the free plan.
Below are some of the key features offered by GitHub Actions:
- Hosted runners for every major OS hosted by GitHub
- Self-hosted runners
- Matrix builds to simultaneously test across multiple operating systems
- Support for most of the popular programming languages
- Live logs
- Built in secret store
- Multi-container testing
- Community-powered workflows
Creating a workflow
Folder structure
Creating a new workflow requires that you create a new file with the following folder structure (within the root folder of your project):
1
.github/workflows/my-cicd-workflow.yml
Folder and file names starting with a dot (.) are hidden. When committing and pushing your code changes, GitHub will look for your workflows within this folder structure and automatically run them accordingly.
YAML workflow definition
GitHub Actions uses YAML to define workflow definitions.
For our example, we will have a look at a workflow for creating a containerized microservice written in Go:
1
2
3
4
5
6
7
8
9
10
11
12
13
14
15
16
17
18
19
20
21
22
23
24
25
26
27
28
29
30
31
32
name: CI

on:
  push:
    branches:
        - develop

jobs:
  build-and-publish-develop:
    runs-on: ubuntu-latest
    if: github.ref == 'refs/heads/develop'

    steps:
    - uses: actions/checkout@v2

    - name: Setting up Go
      uses: actions/setup-go@v2
      with:
        go-version: 1.15

    - name: Build app
      run: go build -v ./...

    - name: Run unit tests
      run: go test -v ./...

    - name: Build and publish docker image
      uses: VaultVulp/[email protected]
      with:
        github-token: $
        image-name: my-microservice
        image-tag: develop
Let’s start by dissecting the workflow file and see what makes up a typical workflow:
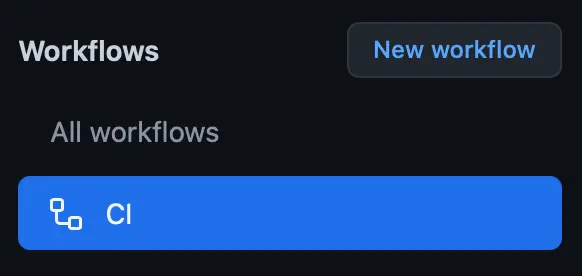
The name of your worflow
1
name: CI
This translates to the name shown on GitHub, under the Actions menu:
Triggers
Triggers that will run our workflow. Here we tell GitHub to run our workflow as soon as we push code changes to the develop branch of our repository.
1
2
3
4
on:
  push:
    branches:
        - develop
Jobs
Jobs that will execute as soon as our triggers get triggered.
1
2
3
4
5
6
7
8
9
10
11
12
13
14
15
16
17
18
19
20
21
22
23
24
25
jobs:
  build-and-publish-develop:
    runs-on: ubuntu-latest
    if: github.ref == 'refs/heads/develop'

    steps:
    - uses: actions/checkout@v2

    - name: Setting up Go
      uses: actions/setup-go@v2
      with:
        go-version: 1.15

    - name: Build app
      run: go build -v ./...

    - name: Run unit tests
      run: go test -v ./...

    - name: Build and publish docker image
      uses: VaultVulp/[email protected]
      with:
        github-token: $
        image-name: my-microservice
        image-tag: develop
Jobs run in sequential order and will fail the entire workflow as soon as one of them fails. Only once all the jobs successfully run does the workflow completes.
Runners
To run your jobs, you need to specify the runner it will run on. This is done by setting runs-on.
In our example, we are setting up our runner to use the latest version of Ubuntu:
1
runs-on: ubuntu-latest
Steps
Jobs consist of multiple steps which in turn can run other actions.
Below we have a step that uses a community-powered action called actions/setup-go@v2 that sets up a go environment for us:
1
2
3
4
5
6
7
 steps:
    - uses: actions/checkout@v2

    - name: Setting up Go
      uses: actions/setup-go@v2
      with:
        go-version: 1.15
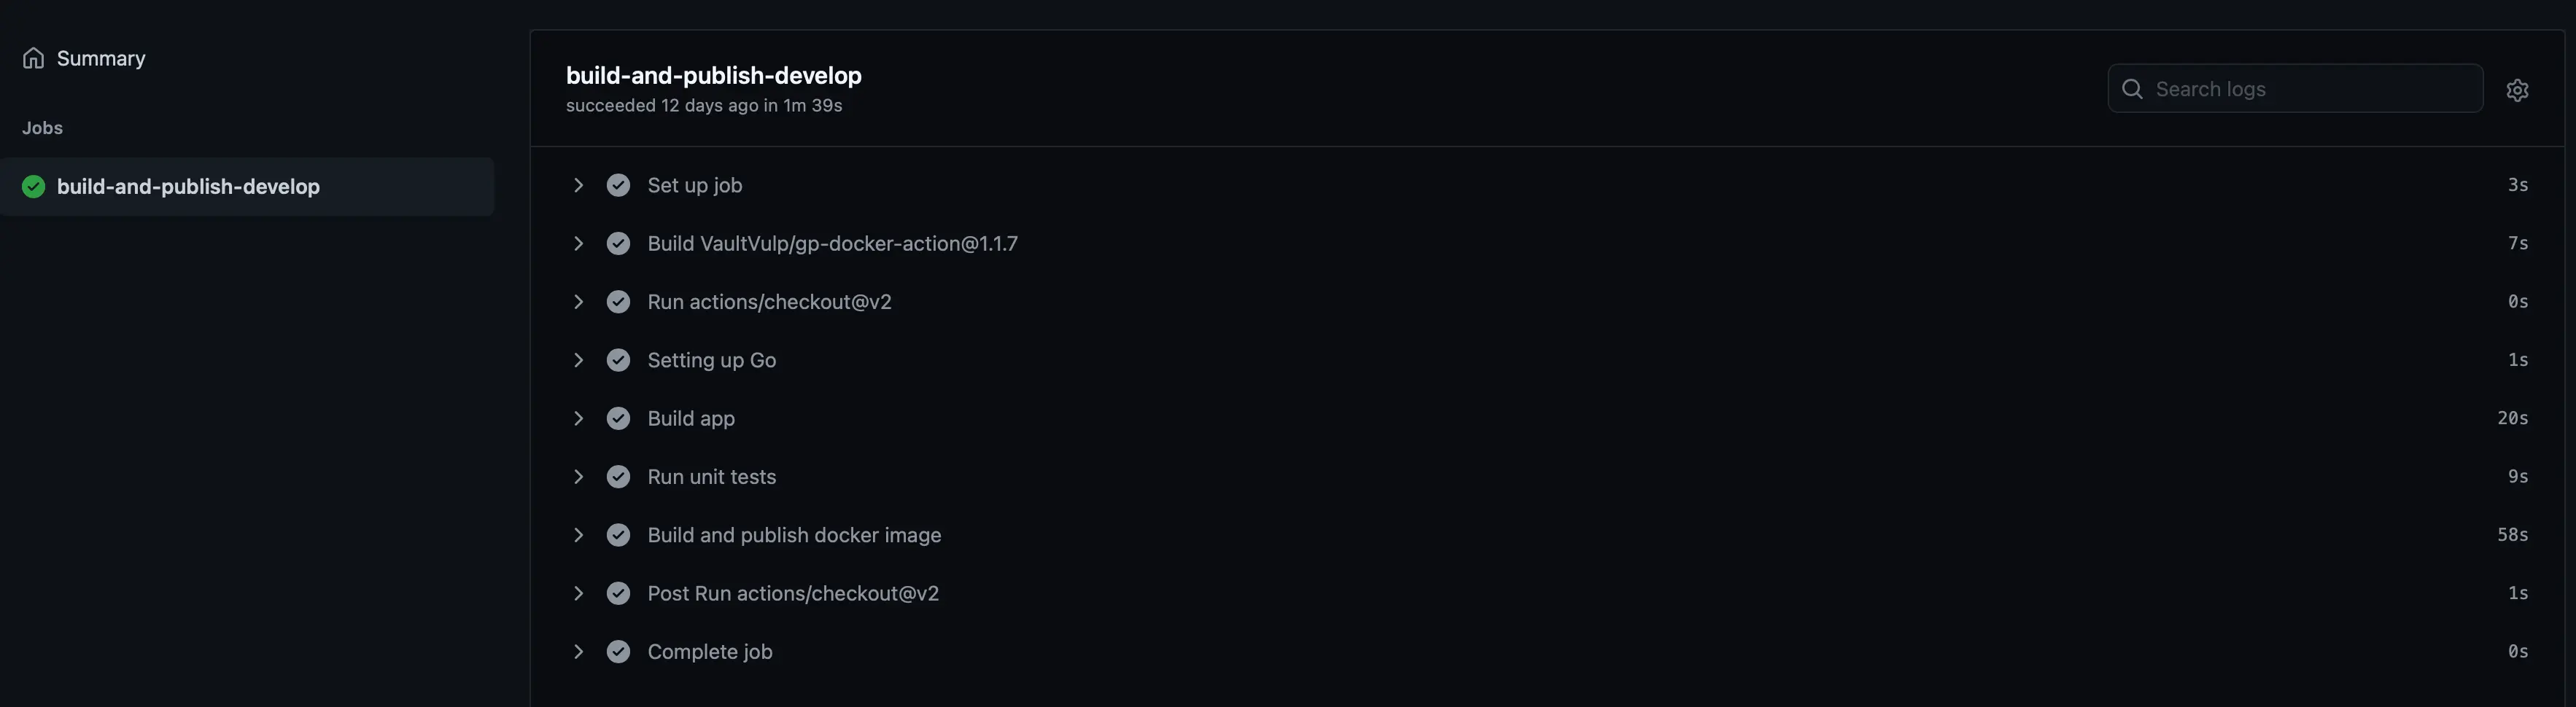
Similarly, we also have steps to automatically build our app, run the unit tests, and publish the docker image on GitHub:
1
2
3
4
5
6
7
8
9
10
11
12
 - name: Build app
      run: go build -v ./...

    - name: Run unit tests
      run: go test -v ./...

    - name: Build and publish docker image
      uses: VaultVulp/[email protected]
      with:
        github-token: $
        image-name: tilliopos-data-service
        image-tag: develop
On GitHub, this translates to:
Community-powered actions
Another great feature of GitHub Actions is the extensive collection of community-powered, open-source actions you can use. These are great time savers, and more often than not, you will find that somebody has already published an action that you integrate into your workflow.
In just this example alone, I was able to use two different community-powered actions, one for setting up a Go environment: actions/setup-go@v2 and the other for building and publishing a Docker image to GitHub VaultVulp/gp-docker-action.
Example
Now that we have created our workflow definition, it is time to commit and push our code changes to GitHub:
1
2
3
git add .
git commit -m "Adding GitHub workflow"
git push origin -u develop
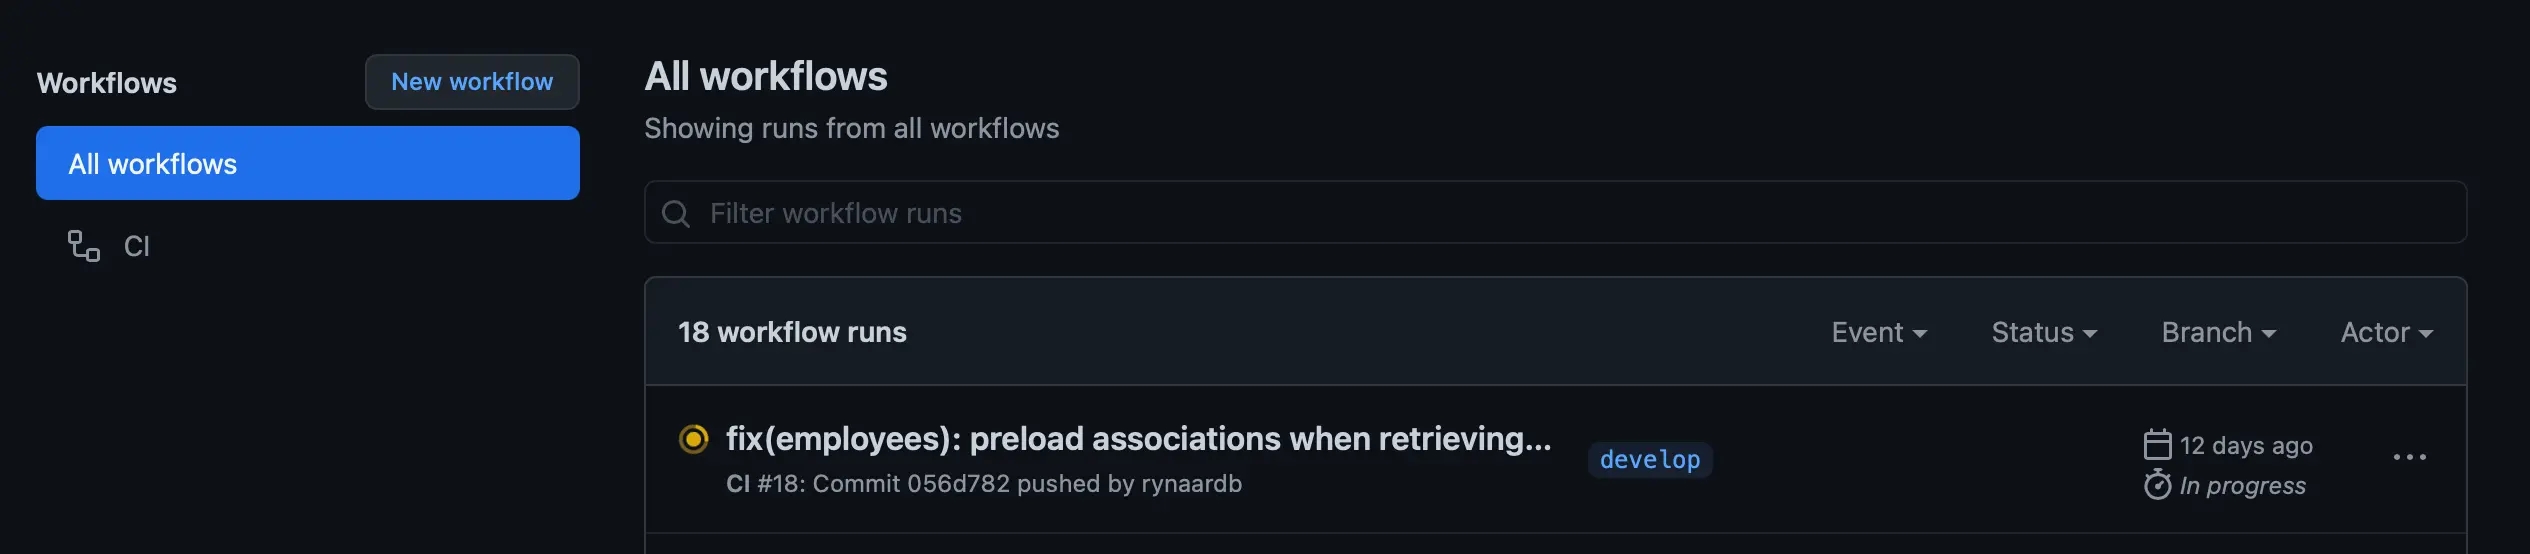
GitHub will detect that we have a workflow definition in .github/workflows/ and will automatically start to run it every time we push code changes.
Navigate to the Actions menu on GitHub and see your workflow in action:
Conlusion
If you haven’t yet considered automating your integration and deployment processes, you really should! And with GitHub Actions, this is now easier than ever.
What I like about GitHub Actions is how low the barrier to entry is. Getting started is really easy with minimal setup required and will save you a lot of time, money, effort, and frustration in the long run once set up.